在k8s集群中部署应用
kubectl run 直接部署pod
kubectl run testapp --image=ccr.ccs.tencentyun.com/k8s-tutorial/test-k8s:v1
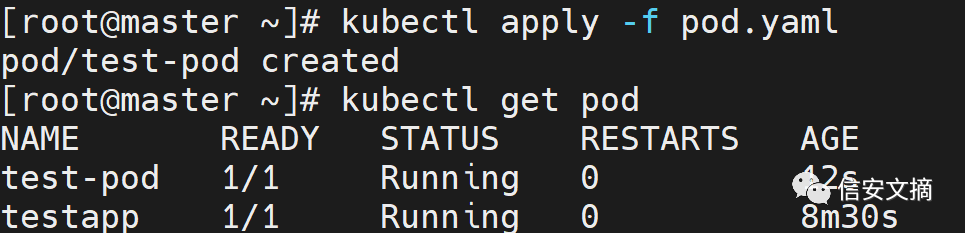
可以看到pod创建成功:

通过yaml文件创建pod
pod.yaml
apiVersion: v1
kind: Pod
metadata:
name: test-pod
spec:
 # 定义容器,可以多个
containers:
  - name: test-k8s # 容器名字
    image: ccr.ccs.tencentyun.com/k8s-tutorial/test-k8s:v1 # 镜像
kind表示这是一个Pod;
metadata中的name定义了这个pod的名字;
spec中的containers中可定义多个容器,容器名字和容器镜像地址;
kubectl apply -f pod.yaml
运行这个文件:
通过yaml文件创建deployment
在集群里面需要运行很多pod,可以运行一个Deployment:
app.yaml:
apiVersion: apps/v1
kind: Deployment
metadata:
 # 部署名字
name: test-k8s
spec:
replicas: 2
 # 用来查找关联的 Pod,所有标签都匹配才行
selector:
  matchLabels:
    app: test-k8s
 # 定义 Pod 相关数据
template:
  metadata:
    labels:
      app: test-k8s
  spec:
     # 定义容器,可以多个
    containers:
    - name: test-k8s # 容器名字
      image: ccr.ccs.tencentyun.com/k8s-tutorial/test-k8s:v1 # 镜像
spec的replicas为该deployment中运行的pod数量;
deployment通过标签label来关联创建的若干个pod,label是一个key:value的值,如上面的app: test-k8s;
spec-template中定义容器,容器中的metadata-labels定义一个与deployment一样的标签,用来与该deployment进行关联;
pod名字后面加了随机串。
pod常用操作命令
部署应用
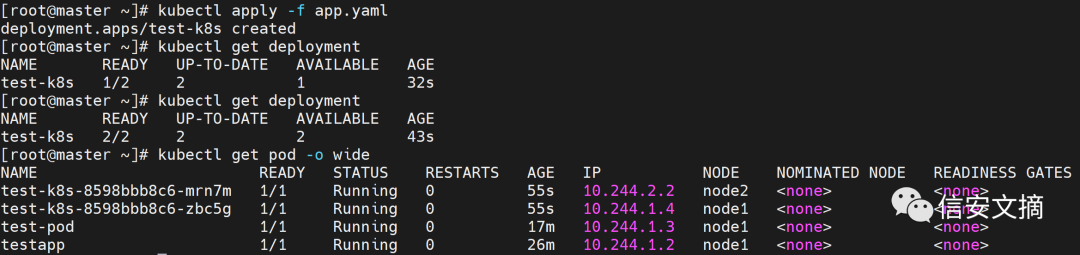
kubectl apply -f app.yaml
查看 deployment / pod
kubectl get deployment
kubectl get pod -o wide
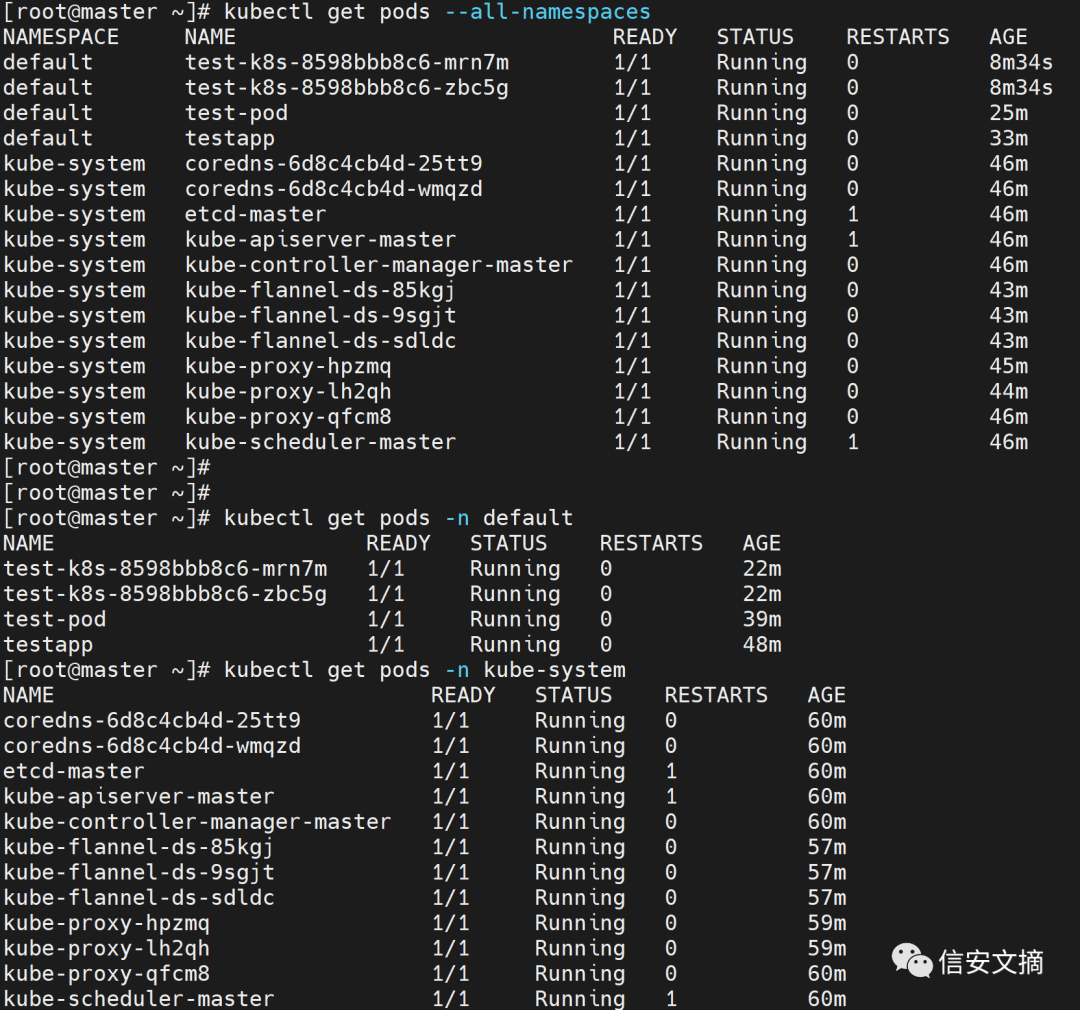
查看所有/指定namespace下的pod
# 查看所有namespace下的pod
kubectl get pods --all-namespaces

# 查看指定namespace下的所有pod
kubectl get pod -n kube-system
describe 查看 pod 详情
# 查看 pod 详情
kubectl describe pod pod-name

查看pod运行日志
# 查看pod 运行 log
kubectl logs pod-name

exec进入pod里面
# 进入 Pod 容器终端, -c container-name 可以指定进入哪个容器。
kubectl exec -it pod-name -- bash
--无其他含义,只是版本问题:


pod里面的容器名字可以通过kubectl describe pod pod-name查看。
复制文件操作
kubectl cp pod-name:容器内文件路径 /root/主机目录文件 -n namespace

kubectl cp test-pod:/app/log4js.json /root/log4js.json -n default

kubectl cp /root/.bash_logout test-pod:/app/.bash_logout -n default
把pod集群内端口映射到节点所在服务器
# 把pod集群内端口映射到节点所在服务器
kubectl port-forward pod-name 8090:8080

需要保持一直转发,终端不能断。
kubectl get all 查看全部
# 查看全部
kubectl get all

参考链接
https://k8s.easydoc.net/docs/dRiQjyTY/28366845/6GiNOzyZ/puf7fjYr